For instructions on making your Wonder Oven Insulated Cooking Box, read this post from yesterday.
To use your Wonder Oven, you’ll need a pot with a lid that fits well (not bent or gapping) to hold the food. The pot should be about the same size as the food you’re putting in it. Airspace kills your insulating value, so don’t cook a little bit of food in a large pot and expect it to work well. Short handled pots are better than pots with long handles since the long handle can create air leakage. If all you have are long handled pots, just be extra careful to make sure the cushions of the cooker are packed around the handle area so air isn’t getting in to the pot space.
Next, you’ll need to know what you want to cook. Meals with high liquid content are best. Soups, stews, chili, etc. If you want to do veggies or chicken without boiling it, seal them in oven bags before putting them in the pot of water. You could also use meats or veggies in vacuum sealed bags like the FoodSaver bags since those bags will withstand a lot of heat. The bagged food is then boiled in a pot of water to cook it.
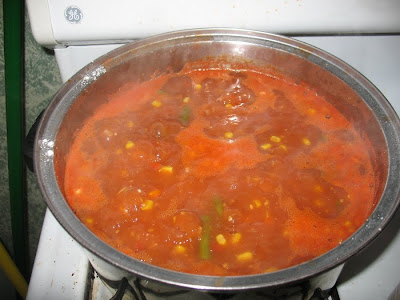
Boil your food in the pot over your stove, campfire, etc. for 10-15 minutes. I made beef and veggie stew:
If you’re starting your stew with raw meat, brown the meat before adding the rest of the ingredients. I got a late start on this stew, so I cheated and used bottled meat. This was one of those throw it together types of stews. The whatever-is-on-hand stew. You know that kind. But basically, here’s what I put in:
1 quart jar tomatoes
1 1/2 quart jar water
1 beef bullion cube
1 pint bottled elk meat juice and all
leftover green beans from the fridge
can of corn
chopped onion
small handful of dehydrated mild peppers
fresh carrots sliced
fresh potatoes cubed
a smidge of pearled barley (that’s all I could find)
some rice (dry)
a bit of flour so it would thicken the soupy part a little
some salt/pepper/garlic powder
I think that’s it.
I put it in in that order as the pot was heating up, so by the time I got to the rice, it had been boiling for at least 15 minutes.
Put your lid on your pot as it’s boiling so the lid gets warm. Prepare your Wonder Oven. I put towels in to keep it clean–remember it’s not my cooker–I made it as a gift for a friend. Nothing like getting a gift with a little soup already on it! Yes, now my friend knows I used her Wonder Oven before giving it to her. No, I don’t think she’d mind–she’s that kind of friend. You can wash the cooker if it gets mucked up, but you might as well towel your pot and just wash towels if there’s any spillage.
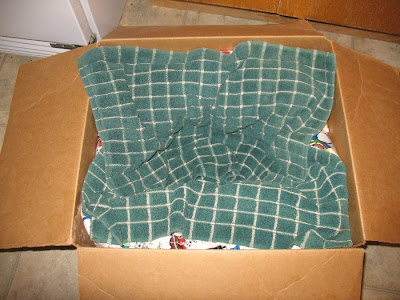
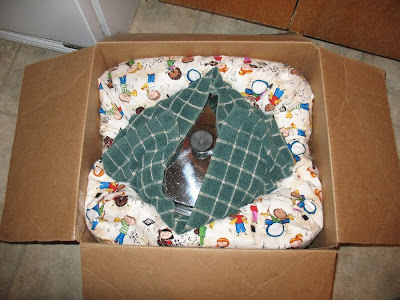
The Wonder Oven is designed with a hollowed out area in the center. That’s where you’ll put your hot pot. Right off the stove/heat source into the cooker pocket.
I kind of wrapped the towels around it. If you have a smaller pot, squish the cooker around a bit to conform to the size or shape of your pot. You don’t want any air pockets. Then apply the top piece of the Wonder Oven, again, check for air pockets. It should conform easily to your pot shape.
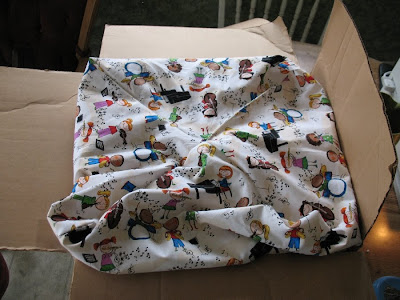
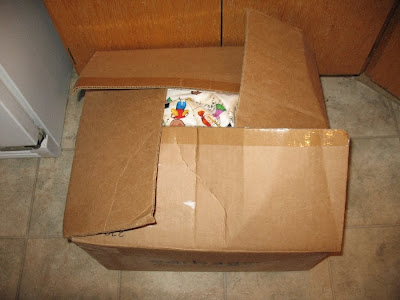
And shut the box. Or put the lid on the box. Or if you have your cooker in something besides a box, put something on top of it to keep the top in place.
Now this is the hard part. Let it sit. Don’t open it. Don’t let your kids open it. No peeking.
A stew like this should sit for 3-4 hours, but it can be in there longer–it won’t hurt it. Mine was in the box 3 1/2 hours. I wish I had stopped to take a picture when I pulled it out, but we were eating. After 3 1/2 hours in the box, the soup was steaming hot–the kids put ice in theirs so they could eat it. The pearled barley and rice that was dry when I put it in the Wonder Oven were fully cooked, as were the potatoes and carrots. Amazing.
The cooking box can be used for purposes other than soup. Here’s a few recipes and ideas from our local extension agent, Christine Jensen:
Hot Oatmeal Cereal
2 cups quick oats
4 cups boiling water
Stir oats into boiling water, put lid on and place quickly between cushions of the Insulated Cooking Box for 15 minutes or more. Stir before serving.
Rice
2 cups rice
3 1/2 to 4 cups salted boiling water
Stir rice into boiling water. Note: because water does not evaporate you may need less water than usual. Place quickly into the insulated cooking box and leave for 40 minutes or longer until ready to eat.
WHAT? to cook rice I only need enough fuel to bring water to a boil? Fantastic.
Chicken and other meats
Place chicken into an oven cooking bag with desired spices, close bag. Bring a pot of water to a boil with the chicken in it. Boil well (about 15 minutes) and quickly place water and chicken into the insulated cooking box and place top cushion on. Leave alone for 3-4 hours.
The insulated cooking box can also be used to keep things frozen for 3-4 hours. This will be very handy getting sweet husband’s favorite ice cream home from the store 45 miles away where they actually carry it and don’t charge half our paycheck to buy it.
Now here’s the food safety disclaimer: Never place a pot of half eaten or lukewarm food in the Insulated Cooking Box. It should be properly cooled in a refrigerator or cooler until the rest can be eaten. For food safety, leave food out only 2 hours maximum before refrigeration.
SOOOO, can you see where an item like this could save you on your fuel needs? If you only have to cook your soup 15 minutes instead of an hour or bring water to a boil to have fully cooked rice, that’s a good deal.
Keep preparing! Angela
***************************************************************
Subscribe to my email newsletter for updates and special deals.
Please be sure to follow Food Storage and Survival on Facebook which is updated every time there is a new article. You can also find me on Pinterest, and purchase my book, Food Storage for Self Sufficiency and Survival on Amazon.
***************************************************************
Shop the Thrive Monthly Specials or my favorites, the freeze dried vegetables and yogurt bites!
***************************************************************


That is so cool! And it's wonderful to known that my Cooker already works! (Of course I don't mind that you used it.) Although I am even more flattered, I thought you would have made one for you too. You really are wonderful! I will try it out very soon!
Angela, thanks for the really neat post about something I think I might like to have!
Soon, fuel is going to be harder and harder to get…so anyway that we can conserve it is great!
Great post!
For more recipes and other information on "thermal cooking" look at this blog: http://thermalcooker.wordpress.com/category/recipes-all/
Thanks for these recipes and patterns and instructions on making a wonderbox.
Angela, I use my solar oven as an insulated cooker for those cloudy days in a similar manner, putting towels and or pillows around the pot and covering/closing the cooker. It works awesome! Great way to double use the solar cooker.
I love the post. It inspires me to use the one I made months ago. I just wonder where to find the information on the UVU Extension website though? I tried looking up insulated cooker and wonderbox cooker and couldn't find anything. Any suggestions. Love your site by the way.
I’ve been obsessed with making one of these for years. But, I could cook a full meal in far less than 15 minutes of boiling heat. I can see if you had super tough meat to cook, or grains that just needed to come to a boil and be put in. But in terms of fuel use it seems it would be more economical to slice meat and veg thinly so they cook super fast instead.